3-Steps to Produce Successful Welcome Videos
I have been teaching adults for over a decade and there is something that has always been the key component to helping students start off right and helps to make them feel comfortable with a new teacher. It is the dreaded welcome video.
I can hear the teachers huffing and puffing and can imagine all the eye rolls taking place. Trust me, I used to feel the same way. Until I learned how beneficial welcome videos can actually be. Where is the proof you say? Well...here it is:
Exhibit #1: The End-of-course Survey
Consistently when students are surveyed at the end of my courses, over 85% of my them reference the benefit of the welcome videos and how it made them feel comfortable starting my classes.
Exhibit #2: The Three-year Research Study
I conducted a three year research study for adult learners, who were not tech savvy, to use technology over a 6-week period of time. One of the components that was statistically significant when it came to their approval of the program (social validity) was the welcome videos I produced for each new concept they were learning.
I used TechSmith video hosting to measure how many were watching the videos to the end and astonishingly over 98% watched every video to the end. Even the ones over 20 minutes long! The qualitative feedback we collected also showed that the videos were a key element to them being able to feel empowered to complete the research study. Many of them asked for more videos!
At first, I thought it was just me and all my brilliance that covered the screen that won them over (I am only kidding). What I learned from detailed interviews of my adult students, however, was that the videos that consistently had three (3) main components, which allowed the students to learn more about me and my teaching style as well as keep them engaged in the content of the video were the most successful.
In this post, I provide the three components and a sample for you to form your own opinion about using videos to welcome your students.
Checkout the sample video above or to the right of your screen.
Component 1: A vibrant, humble introduction

Every time my family and I take group pictures, I always make sure we get a silly one. Not only because my kids love those shots, but also because it let’s my students know that when I share these photos in my intro videos that I don't take myself too seriously. Even when I show my family’s silly picture live in class, I get the same reaction: laughter. And you can just feel the tension from the students melt away.
The thing I have always found a benefit is that I get to teach where I graduated. When my students find this out, they feel connected because they know I have a student’s perspective and had many of the same teachers they have had too. I make sure they know we are in this together and that their success is also mine because our alma mater will be the same. But, even in instances that I am teaching in a school I never attended, I still let them know that their success shows my effectiveness as a teacher and I want them to hold me accountable to that.
Introductions that have all of these elements of humility garner both respect and admiration. It says that we are all people here in this place to become our best selves and that we can take on the challenge together.
Starting a new educational journey is challenge enough in the beginning. It can be even more challenging especially if you cannot connect with your teacher. Students already did the hard part. They signed up and made it to class. The least we can do is provide them with an introduction video of ourselves that shows that we have the expertise to teach them as well as the humor necessary to remain humble.
Component 2: A Self-Discovery Activity

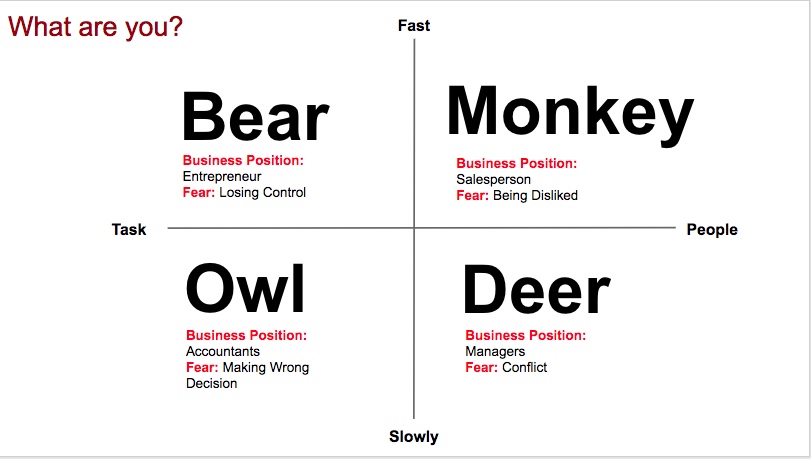
My go-to activity is called “The Animal Kingdom”. I have been using this activity for years and it never gets old! Students love learning about themselves in a quick activity that can help them be successful in class. You can choose a quick one that fits your style and personality. In welcome videos, it is important to not only have an activity, but also show your teaching style while sharing what the students will do. This portion of the video is two-fold.
- The students learn or are reminded of something about themselves and how that something will benefit them as it relates to your class.
- It gives the students a taste of your teaching style. Not everyone teaches the same (thank heavens!) So, giving our students access to how we teach before they ever set foot into the classroom helps them to alleviate some anxiety and feel better prepared.
Component 3: A list of tools for success in your class

What will help a student be successful? Are there any resources you suggest? Is there a part of the curriculum the students would benefit from seeing before class starts? All of these are questions that we need to ask ourselves as teachers. I primarily teach in accelerated programs so anything that I can do to get my students ready to get to the meat of the topics before class begins is very valuable for both them and me.
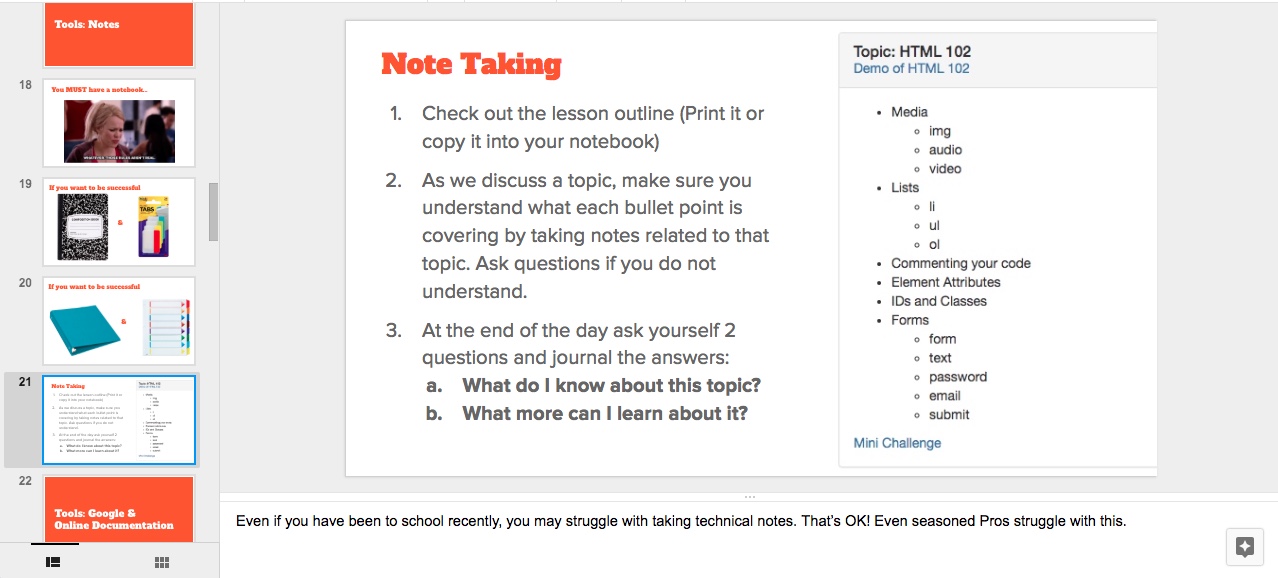
However, the intro video shouldn't be a course content video. It should list the TOOLS students will need to be successful and that is all. Tools are the items that are not included or required in the class. Would they benefit from a notebook? Could creating a google account to access drive make their lives easier? Or, perhaps would a dropbox account be beneficial?
Sometimes if I am teaching a technology, and we are using a tool to access it, I will do a walkthrough of how to navigate the tool, but not get into the details of how we will use the tool. That can be super overwhelming for a newbie and unnecessary for someone who is familiar with the tech. I always put navigation types of tools at the end of the video, so they can skip it if they want.
Conclusion
Forget about the random “Welcome to Class” video that doesn’t get watched to the end and start creating videos that not only get watched, but also inspire your students to want to learn from you.

Here are a few more nuggets to help you consider Welcome Videos.
Benefits:
- Get rid of that awkward first day!
- Record it and edit it once and it is there forever!
- The more you do it, the more confident you will become on camera!
What not to do:
- Create a BORING welcome video: there has to be some activity from the students in any welcome video over 2 minutes long. Don’t just talk at your students.
- Go on and on about something. Sometimes reinteration is important especially if you have been getting the same questions a lot, but don’t drag on a topic for no reason.
- Take for granted that some students are beginners - teach to the least experienced student.
Happy Teaching!
Dr. T


